Quality Assurance Boosted With Automated µCMM
The German-Italian dental product manufacturer Zfx is responding to the Medical Device Regulation with greater precision and automation in quality management. Zfx is a global dental company based in Dachau (Germany) and Gargazon (Italy). On the one hand, Zfx develops and produces prosthetic components for dentists and dental technicians. On the other hand, the company offers specially developed equipment (scanners and milling machines) as well as the corresponding materials for the production of crowns and bridges in the laboratory. Zfx is part of the publicly listed US group Zimvie – a life science company specializing in dental and spinal medicine.

Zfx has been using a Bruker Alicona measuring device for quality assurance of prototypes and product inputs for many years. Until August 2023, Zfx used an InfiniteFocus G5 for this purpose. Werner Weithaler, Senior Engineering Manager at Zfx, confirms: “The InfiniteFocus G5 has met our quality assurance requirements right from the start. We can neither complain about defects nor about inadequate measurements.” Even though the G5 continues to perform well, ZfX has decided to integrate the µCMM coordinate measuring machine for even more accurate and automated measurement. “Because we were already so satisfied with the G5, it was clear that Bruker Alicona would be our first point of contact again,” says Weithaler. The CMM is ideally suited to the dentistry company’s measurement requirements, as the accuracy in the 3D space is even higher and local optical probing can significantly reduce the duration of a complete measurement plan.
Pick and Place Automation
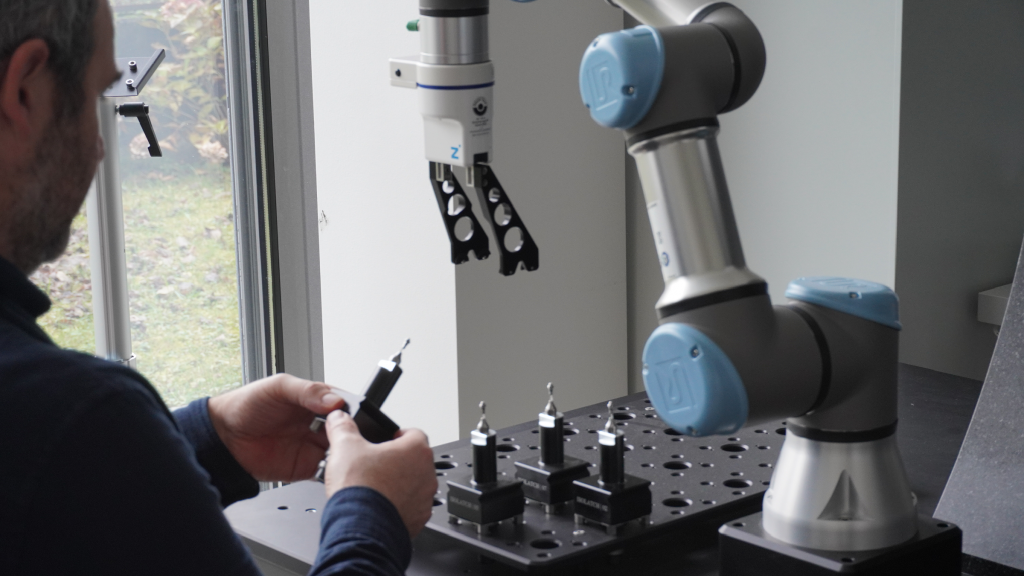
A few months after commissioning the µCMM, ZfX took the next step in terms of quality management by adding a pick and place function to the coordinate measuring machine. “This means that the machine can also measure overnight and at weekends when no employee is on site.” Because the pick and place loads the components automatically, the workflow is never interrupted,” says Weithaler, explaining the advantages.
µCMM Measurements

Due to the comprehensive measurement of all geometric parameters, the device is well utilized: Implants, titanium bases, prefabricated abutments (both are connecting pieces between implant and crown), standard abutments, and screws are among the measuring tasks. Titanium, plastics, and zirconium oxides are in use. External and internal diameters, shape, and position tolerances are measured. We are talking about components smaller than ten millimeters in length, with an internal diameter of fewer than two millimeters. With such small components, the tolerances are naturally correspondingly tight: they are plus/minus 2 µm.
Production Feedback
Through this quality control, Zfx not only shows whether production has adhered to the specified dimensions but can also provide feedback on where there are defects in the production process. The data obtained allows conclusions to be drawn about tool wear or other deficits in production.
Medical Device Regulation Requires New Quality Assurance Direction

Zfx has not been spared the stricter quality requirements imposed by the Medical Device Regulation, which came into force in 2017. However, due to the company’s internal standards they are more relaxed about this than many of its competitors. Lukas Breitenberger, General Manager of Zfx, explains: “Quality has always played the biggest role at Zfx and its parent company Zimvie. Our motto is ‘Quality begins with me! So, every single employee is committed. We didn’t need stricter rules for this, it’s always been done that way. However, the need for control has increased as a result, and the bureaucratic effort has multiplied. This is also associated with high costs. Of course, the patient ultimately benefits from the stricter requirements. The MDR provides more security. But: it will be difficult or even impossible for start-ups to overcome the financial hurdles of the regulation.” In any case, Bruker Alicona’s optical 3D measuring devices are ideally equipped to meet the increased quality requirements.
Based on the technology of Focus-Variation, Bruker Alicona closes a gap between classic coordinate measurement and surface metrology with its measuring systems.
For more information: www.alicona.com


