Phase3D Correlate Additive Manufacturing Build Anomalies to Part Defects With Fringe Research
Phase3D, a company at the forefront of additive manufacturing (AM) inspection innovation is the first company to correlate measurable metal powder bed fusion build anomalies to final part defects in real-time. This work was done for the United States Air Force and NASA, two leading AM producers for the aerospace industry, and validated with two materials on two different laser powder bed fusion (PBF) machines. This is a significant leap forward in AM to ensure build quality and reliability, which has been a challenge for all industries trying to adopt AM.
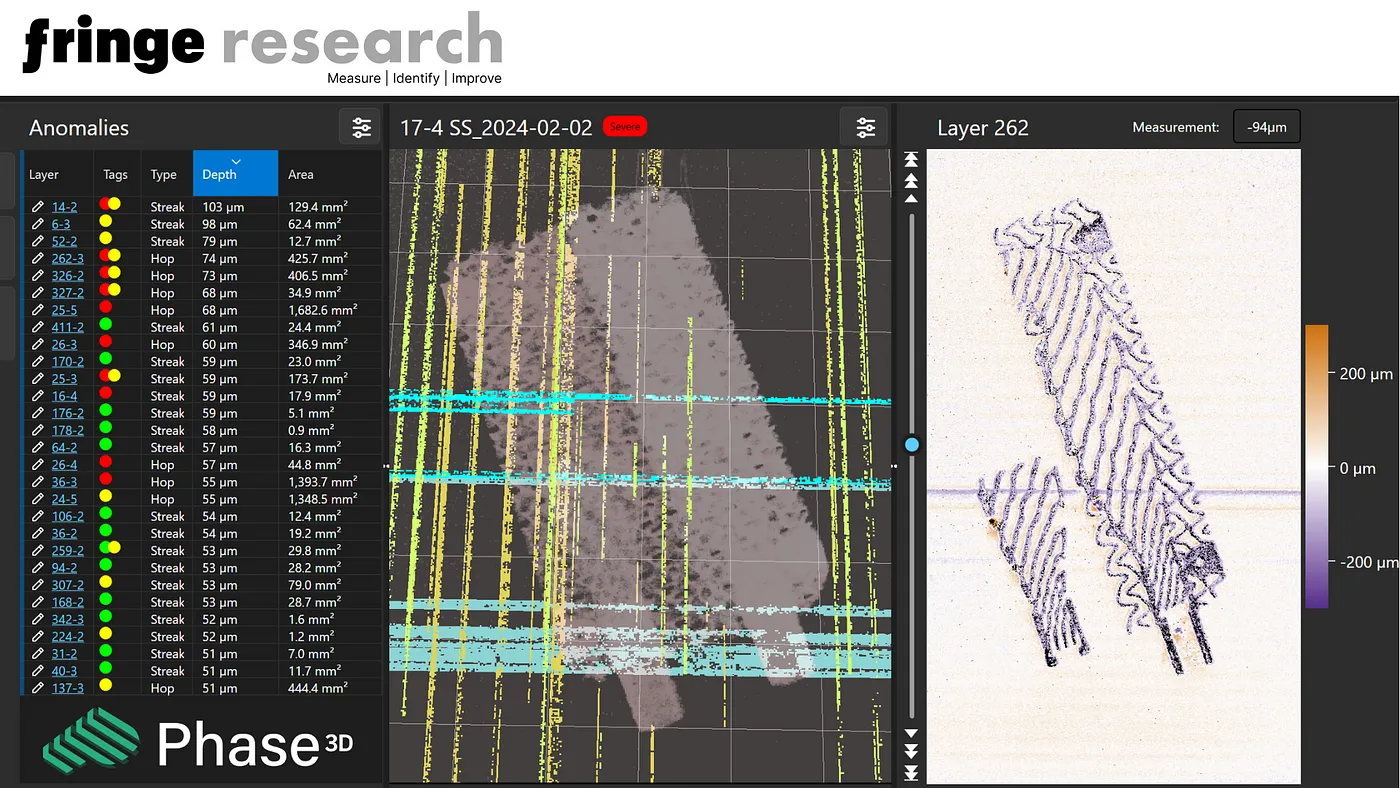
Phase3D has worked closely with the U.S. Air Force and NASA to develop Fringe Research, an in-situ monitoring product which measures, in microns, every layer of a powder-based AM build. The system automatically identifies anomalies from the build process to help improve the AM process. Leveraging Phase3D’s expertise in repeatable, calibratable, and unit-based measurements and analytics, Phase3D is the first inspection company for AM to measure anomalies during the build that lead to porosity, a major cause of part rejection for the U.S. Air Force and NASA. Fringe Research can be used on most powder-based AM systems and employs structured light, a well-known and understood metrology technology, to create the measurements used for this correlation.
For AM to change the world and become a trusted manufacturing process, the industry must validate the build process in real time. Phase3D stands apart from any other in-situ monitoring product on the market with its trusted measurement technology. Fringe Research does not use artificial intelligence (AI) or machine learning (ML) to create measurements or identify anomalies. Phase3D is leading the revolution in this space to support its customers with gathering objective data to reduce project lead time, increase machine utilization, and ensure build quality.
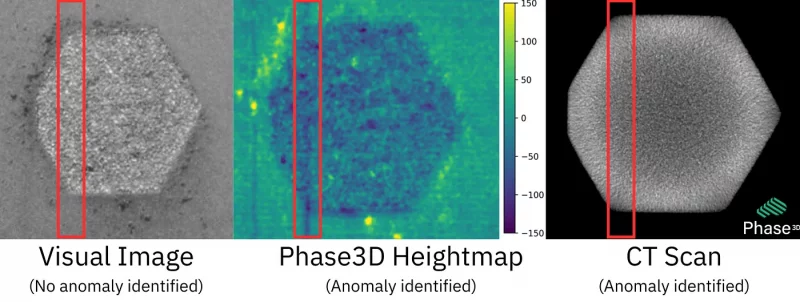
Phase3D printed with Ti64 for the U.S. Air Force and GRCop-42 for NASA to determine the effect of detectable build variation on part quality. The builds included an anomaly generator, which created realistic, geometry-based powder and melted anomalies, including hops and streaks patterns seen in most AM builds. While measuring the build, Fringe Research automatically identified hops and streaks that were later correlated to porosity in the final part. Parts were inspected using CT scanning and correlation was done in Fringe Research and a commercial CT inspection software.
For Ti64 printed on an EOS M290 for the U.S. Air Force:
- 81% of Fringe Research identified anomalies correlated to part defects detected by CT
- 100% of Fringe Research identified anomalies ≥47um depressions correlated to defects detected by CT
For GRCop-64 on a Colibrium Additive (previously GE Additive) M2 for NASA:
- 83% of test specimen identified defects were correlated to layers with Fringe Research identified anomalies
- 100% of Fringe Research identified anomalies ≥42um depressions correlated to defects detected by CT

“Providing our customers a high correlation of measurable build anomalies to part defects is changing what is possible for AM,” says Niall O’Dowd, Founder and CEO of Phase3D. “Our customers continue to request objective data that can identify part defects when they occur. With the data Fringe Research collects, we predict our aerospace customers will be able to increase machine throughput by more than 10% every year by stopping parts that will fail inspection early.”

Fringe Research is shifting the paradigm of in-situ monitoring by measuring the entire build surface three times during every layer. Engineers, designers, quality assurance staff, and managers will no longer guess why a part failed. Fringe Research provides its users with the tools to identify the cause of failure and improve the process quickly. Historically, Phase3D customers relied on visual images from the machine to either identify anomalies using AI/ML or an engineer to watch a video of the visual images or scroll through them. This is not reliable, effective, or smart. Phase3D’s heightmaps and Fringe Research allow everyone the opportunity to identify how build anomalies impact part quality, including CT-identified defects, fatigue life, tensile strength, and more.
For more information: www.additivemonitoring.com


